
Video Tutorial
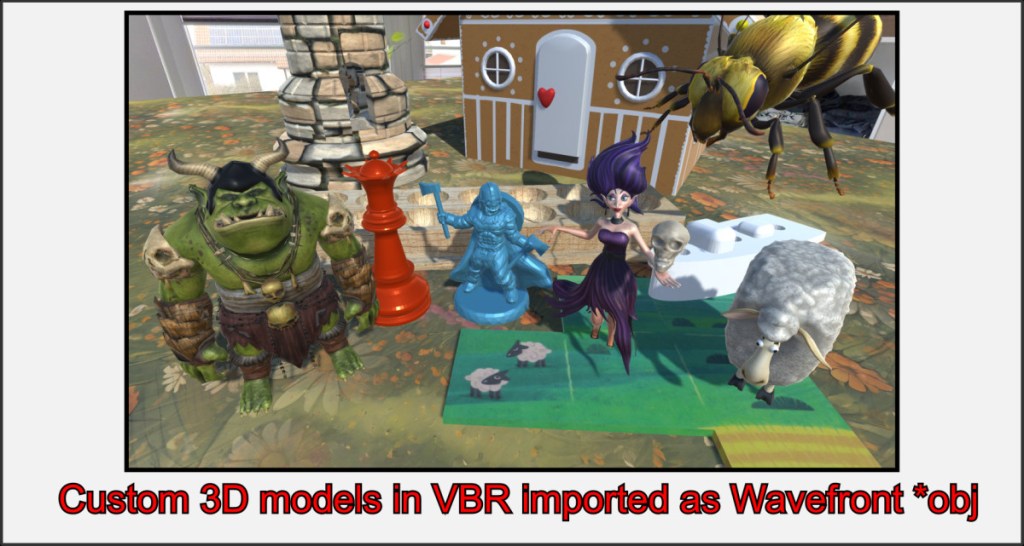
One of the most powerful features of VBR is the ability to import arbitrarily shaped object shells as 3D meshes. This only changes the 3D view of the object, not its original properties.
All basic objects and most special objects accept an imported mesh. The user-defined shells can contain UV maps and externally calculated normals to provide models with complex textures or to create soft outer edges. This feature can be used to implement a wide variety of board game elements.

The starting point for your own models is always a base object into which a 3D mesh is loaded from a Wavefront Obj file. The object saves the properties of its new shell in the same way as, for example, its color or texture. These properties are called up again when the object is loaded.
VBR itself does not currently offer any option for modeling 3D objects. To import meshes, they must be converted into a suitable form and saved as a Wavefront Obj file with certain properties.
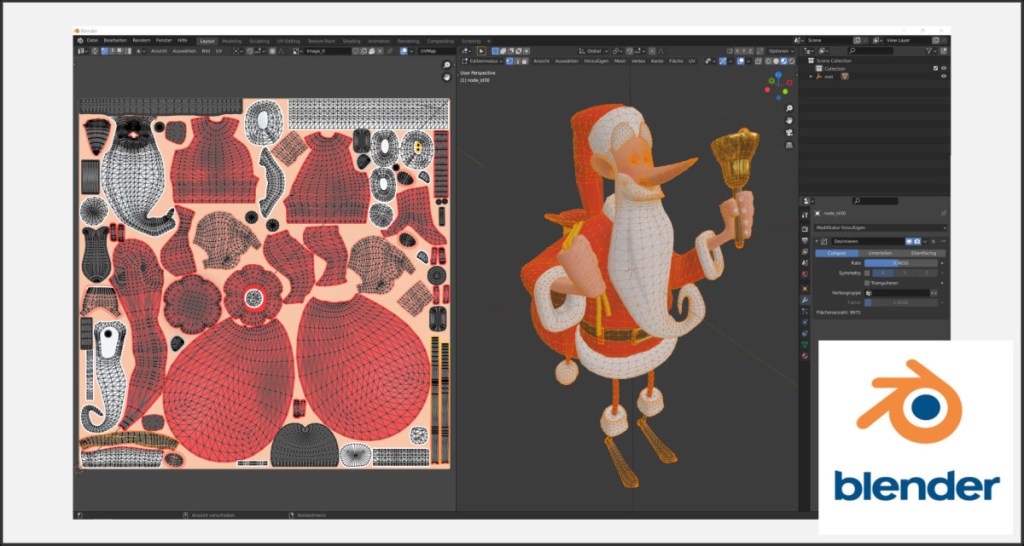
We recommend the free 3D program Blender, which contains all the necessary functions for designing your own figures and objects. You can also obtain objects from the Internet, import them into Blender and prepare them for VBR. Good addresses here are MS Paint3D (Unfortunately, it’s legacy), thingiverse.com and titancraft.com. For this guide we used Blender version 2.91.2. Descriptions may vary for other versions.
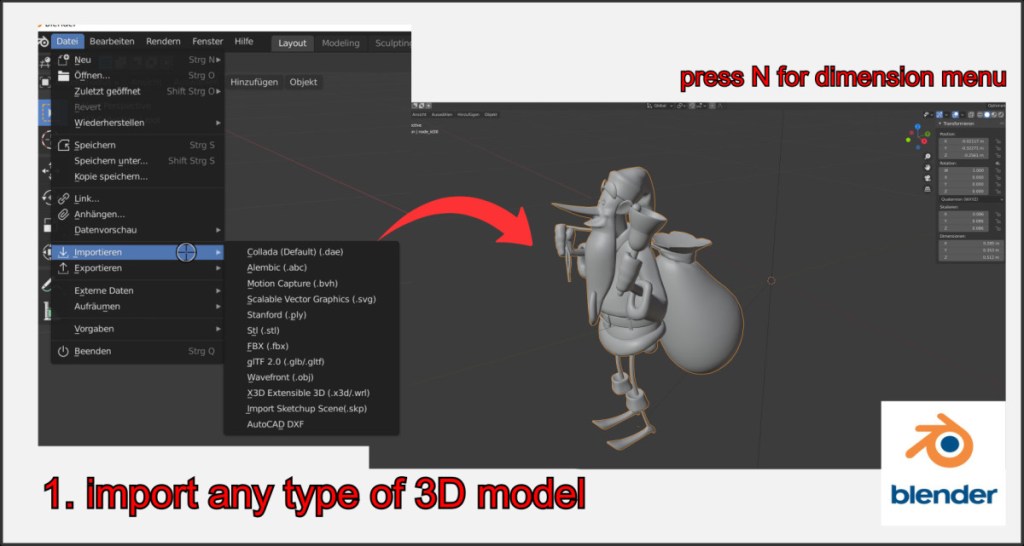
First, create your game object or import it from an available file into an empty Blender project. If a figure consists of several elements, make sure to always have all parts selected or combine them into one object (Ctrl+J).
Polygon Limit
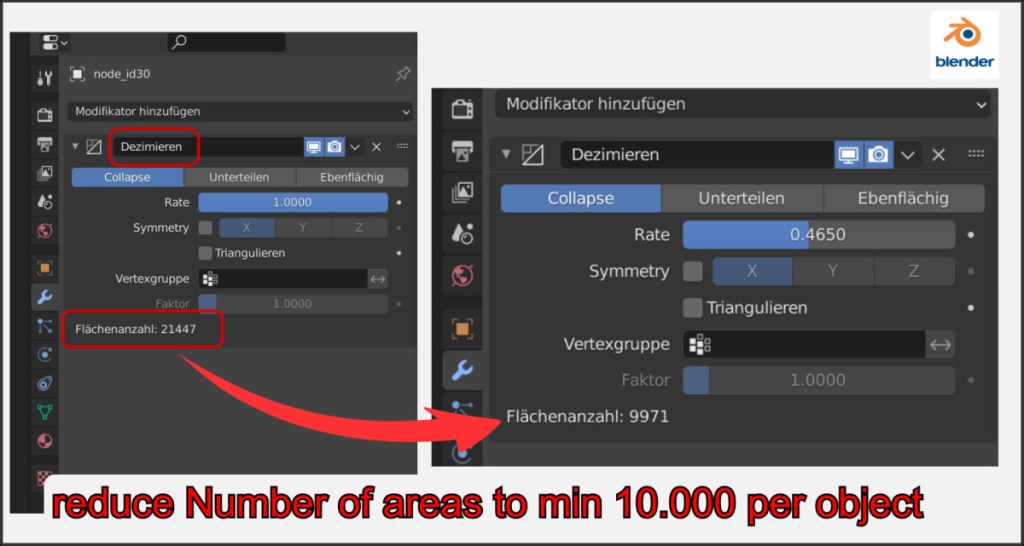
An important limitation is the number of polygon faces of a single object. This is limited to 10,000 faces per object. A single, connected object must be reduced to this number. The Decimate modifier is very suitable for this. Select Collapse and adjust the rate until the number of faces is <= 10,000. You do not have to apply the modifier, it will be applied to your object when exporting.
Center origin of objects
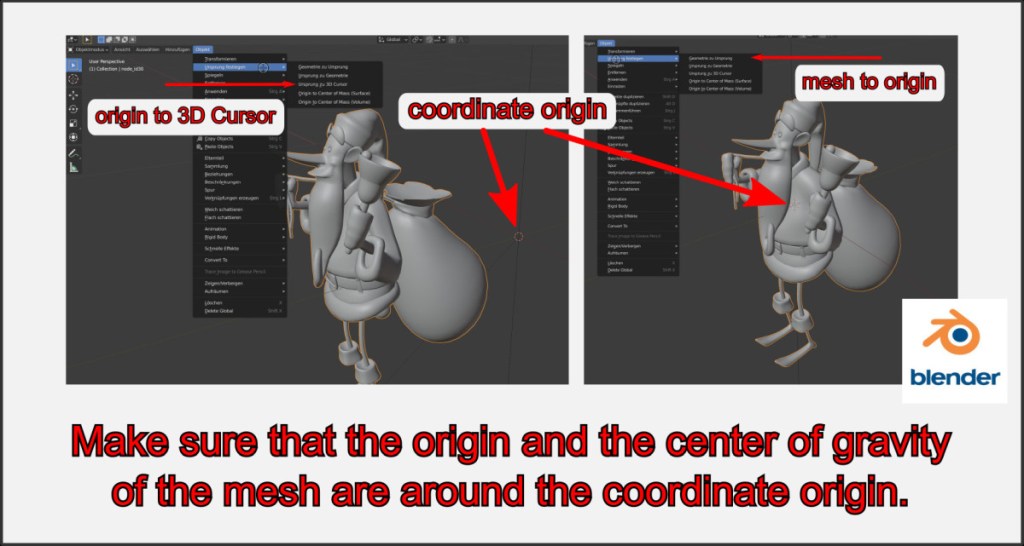
The center of gravity and the origin of an object should both always be in the coordinate origin.
Select your object and first set its origin to the coordinate origin using Object->Set Origin->Origin to 3D Cursor. Then set the center of gravity of the object to the coordinate origin using the same menu via Geometry to Origin.
Sometimes it is advantageous to then move the object a little ‚up‘ on the Z axis.
The object origin is always the pivot point in the VBR over which the object is moved and rotated.
Object Size
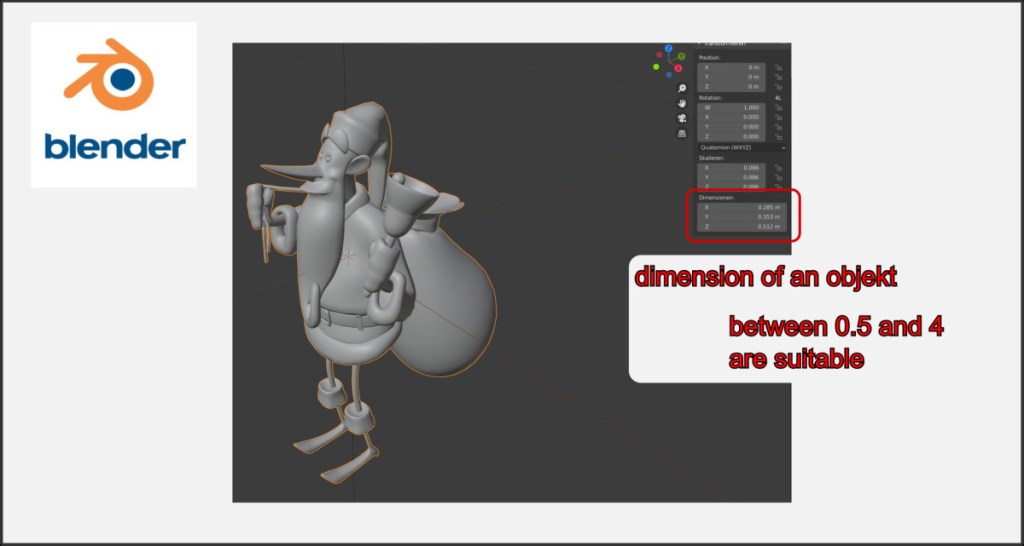
Choose a reasonable size for your game object. This can be adjusted in VBR, but we recommend adjusting the values sensibly when modeling. Values between 0.5 and 4 have proven to be effective here.
Exporting Mesh OBJ file

Select all elements of your object and export them as a Wavefront *.obj file using the corresponding menu.
In the export options, Selection Only, Apply Modifiers and Triangular Faces should be activated.
If you also want to use the normals and UV maps, activate these options as well. Other settings are not recommended.
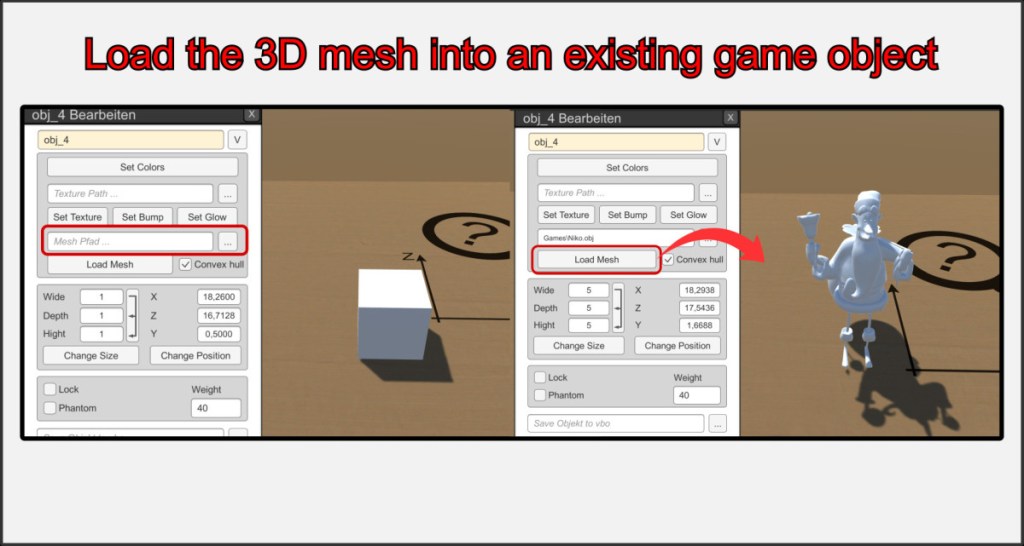
First create a basic or special object in the VBR. You cannot change this choice later. This particularly affects the collision shell of the object. See the next help topic Collision boxes of custom objects.
Now open the object editor and select your desired *.obj file in the mesh path. Then press Load Mesh to import the 3D model and use it as the shell of your game object.
You can then change and adjust all other properties such as color, size, weight or texture as you wish.
